

Call us: 07749674445

You've probably got one of two messes in front of you. A craft glue spill that has dried hard on the tips of the fibres, or a nastier adhesive problem that seems welded into the carpet itself. Those two jobs look similar at first glance, but they're treated very differently.
That's where people go wrong with how to remove glue from carpet. They reach for one product, scrub hard, and end up spreading the residue, roughing up the pile, or driving softened glue deeper into the backing. The fix starts with working out whether the glue is sitting on the surface or bonded lower down.
Table of Contents
- The Two Glue Problems Hiding in Your Carpet
- Identify the Glue Type and Test Your Carpet First
- Removing Water-Soluble Glue Step by Step
- Tackling Cured or Solvent-Based Adhesive
- When DIY Stops and a Professional Should Take Over
- Mistakes That Damage Carpet Fibres During Removal
- Your Quick Reference for Glue Removal Success
The Two Glue Problems Hiding in Your Carpet
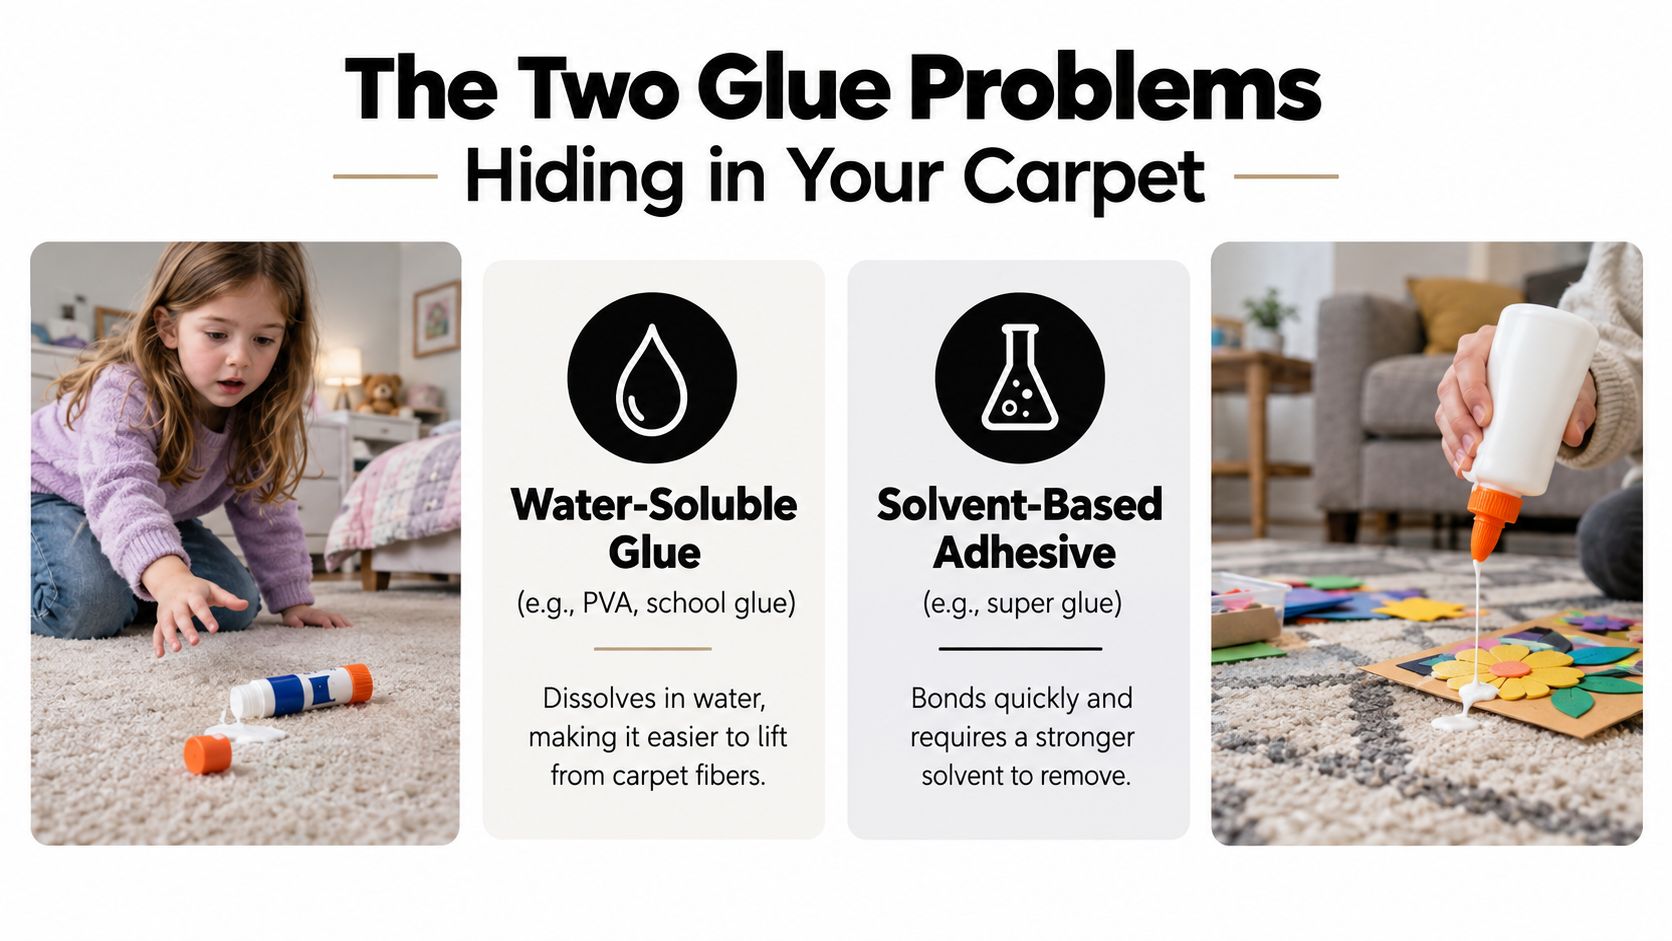
A child drops a glue stick in the bedroom. Someone doing schoolwork spills PVA near the sofa. A bit of DIY adhesive ends up on the stairs. On the day it happens, it all feels like the same problem. In practice, it isn't.
The first type is surface glue. That's the stuff sitting on or around the upper fibres. School glue, some PVA, and other water-responsive products often dry into a film or crust on top of the pile. If you catch it early, or if it still responds to moisture, it can usually be softened and lifted with a controlled water-based method.
The second type is bonded adhesive. That's where the glue has sunk into the carpet backing, grabbed the fibres near their base, or attached itself to underlay or subfloor. This is the job that frustrates people. It doesn't peel away neatly, and brute force usually damages the carpet before it releases.
Surface spill or bonded problem
A quick check tells you a lot:
- If the glue sits like a skin on the pile, you're usually dealing with a surface spill.
- If the carpet feels stiff at the base, the adhesive has likely reached the backing.
- If a patch resists lifting and feels fixed in place, it may be tied into the carpet structure rather than just the fibres.
Practical rule: Scrubbing makes both situations worse. On a surface spill, it smears softened glue sideways. On a bonded adhesive, it pushes product deeper and frays the pile.
In the UK, this distinction matters beyond cleaning technique. Tenancy guidance focuses on the carpet being returned to the same documented condition, not on using a specific cleaning method, and it also recognises that adhesive problems vary by type and may respond differently to warm water, washing-up liquid, scraping, solvent, or mechanical abrasion, depending on the residue and surface involved, as outlined in UK end-of-tenancy carpet guidance.
Identify the Glue Type and Test Your Carpet First
Before you touch the visible patch, identify what landed there. If the tube, bottle, or tin is still around, read it. That saves guesswork. If it says washable, school glue, or PVA, start by assuming water responsiveness. If it smells sharp or chemical, dries glossy and rigid, or came from a flooring or construction product, treat it as a solvent-style adhesive until proven otherwise.
Carpet type matters just as much. Wool can mark, distort, or lose dye more easily than many synthetics. Polypropylene usually tolerates moisture better, but that doesn't mean you can flood it. Polyester often cleans up well, though some finishes react badly to strong solvents.
What to check before treatment
Use this short pre-check:
- Look at the residue: Clear or milky craft glue often behaves differently from amber or rubbery adhesive.
- Feel the area: Brittle on top suggests a surface deposit. Hardness through the base suggests backing involvement.
- Check pile direction: Work with the lay of the fibres when lifting. Going against it can rough up the finish fast.
- Choose a hidden test spot: Inside a cupboard edge, under furniture, or on an offcut if you have one.
The hidden-area test
Apply a tiny amount of whatever you plan to use on the test area first. That means warm water solution, acetone, or a commercial adhesive remover. Blot it, wait, then inspect.
You're looking for three warning signs:
| Warning sign | What it means |
|---|---|
| Colour transfer to cloth | Dye instability |
| Fibre texture change | Heat, solvent, or moisture damage |
| Backing softening or separation | Delamination risk |
If the test patch lightens, goes tacky underneath, or sheds colour, stop there. The glue spot is still repairable. A damaged carpet face often isn't.
This stage feels slow when you just want the mark gone, but it's the step that stops a removable stain turning into a permanent repair.
Removing Water-Soluble Glue Step by Step
For water-soluble glue, patience works better than force. UK DIY guidance for moisture-responsive carpet adhesive recommends soaking the residue for about 1 hour before careful removal, with the main risk being aggressive scraping before the glue has fully softened, as explained in Bosch DIY's carpet glue removal guide. That same principle applies on carpet fibres. If the glue hasn't softened, don't fight it.
The safest working method
Start with the least aggressive version of the job.
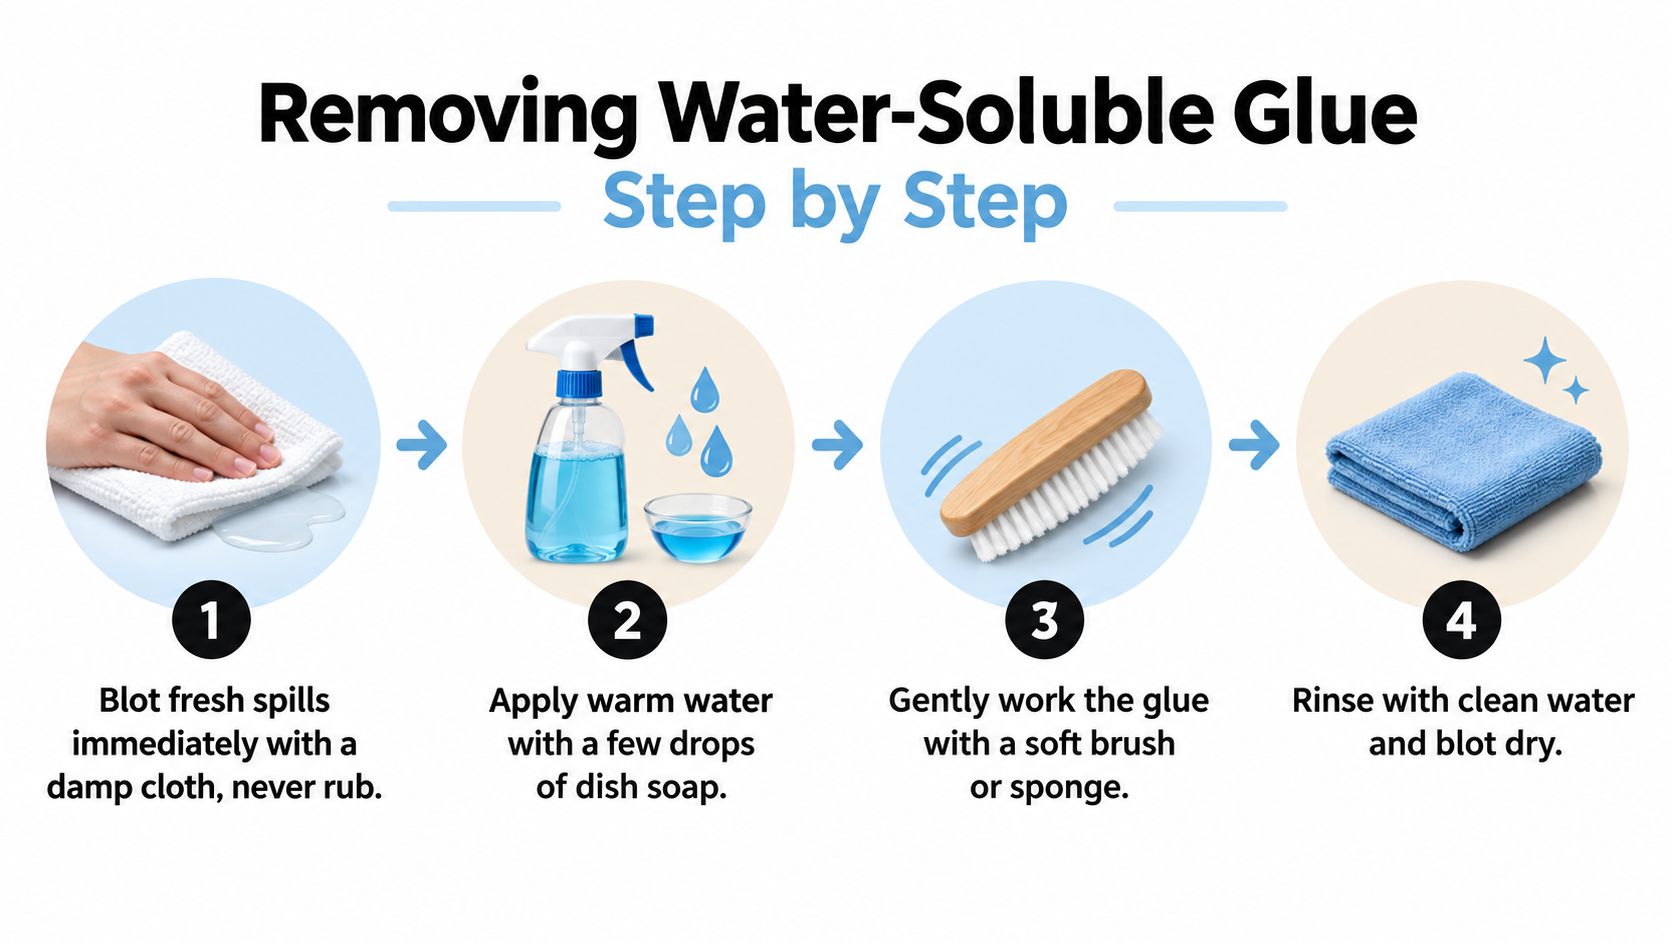
Blot fresh glue first
Use a damp white cloth and lift what you can. Don't rub. Rubbing spreads glue through clean fibres.Apply warm water with a little washing-up liquid
Damp the area rather than soaking it. If the glue is still responsive, give it time to loosen. For light surface residue, a short dwell may be enough. For tougher water-soluble adhesive, longer softening is often what makes removal possible.Lift with a plastic edge
Use a plastic scraper, old bank card, or spatula. Work from the outside in so you don't widen the spot.Blot, then repeat
Most glue spills don't come out in one pass. Alternate softening and lifting.
Here's a quick visual walkthrough before you start on the carpet:
What actually works and what doesn't
A lot of home fixes fail because they use the right product the wrong way.
- Works well: Controlled moisture, dwell time, plastic lifting tools, white cloths.
- Usually fails: Hard brushing, kitchen scourers, metal blades, and repeated shallow wetting that never softens the core of the glue.
- Often causes extra damage: Hairdryers on hot settings, bleach-based cleaners, and ironing unknown residue into the pile.
Let the water do the work first. If you keep having to scrape harder, the glue isn't ready to move.
When the area is nearly clean, rinse lightly with plain water and blot dry with clean towels. If the backing has taken on moisture, press down with dry towels to pull it back out. If you want a service option rather than doing repeated spot work yourself, SWC Cleaning's eco-friendly carpet cleaning is one route for carpet-safe treatment.
Tackling Cured or Solvent-Based Adhesive
Once adhesive has cured, water alone usually won't touch it. People get impatient, pour solvent straight onto the carpet, and end up with a pale patch or a glue ring twice the size of the original mark.
In the UK, guidance for tougher adhesive on carpet converges on a solvent-assisted spot treatment. Acetone may be used with a short contact time of roughly 2 minutes, while a commercial adhesive remover for floor residue may be left 10 to 15 minutes before scraping, with the key warning being to use minimal product and avoid spread into the backing, as noted in Designer Carpet's adhesive care guidance.
The controlled solvent method
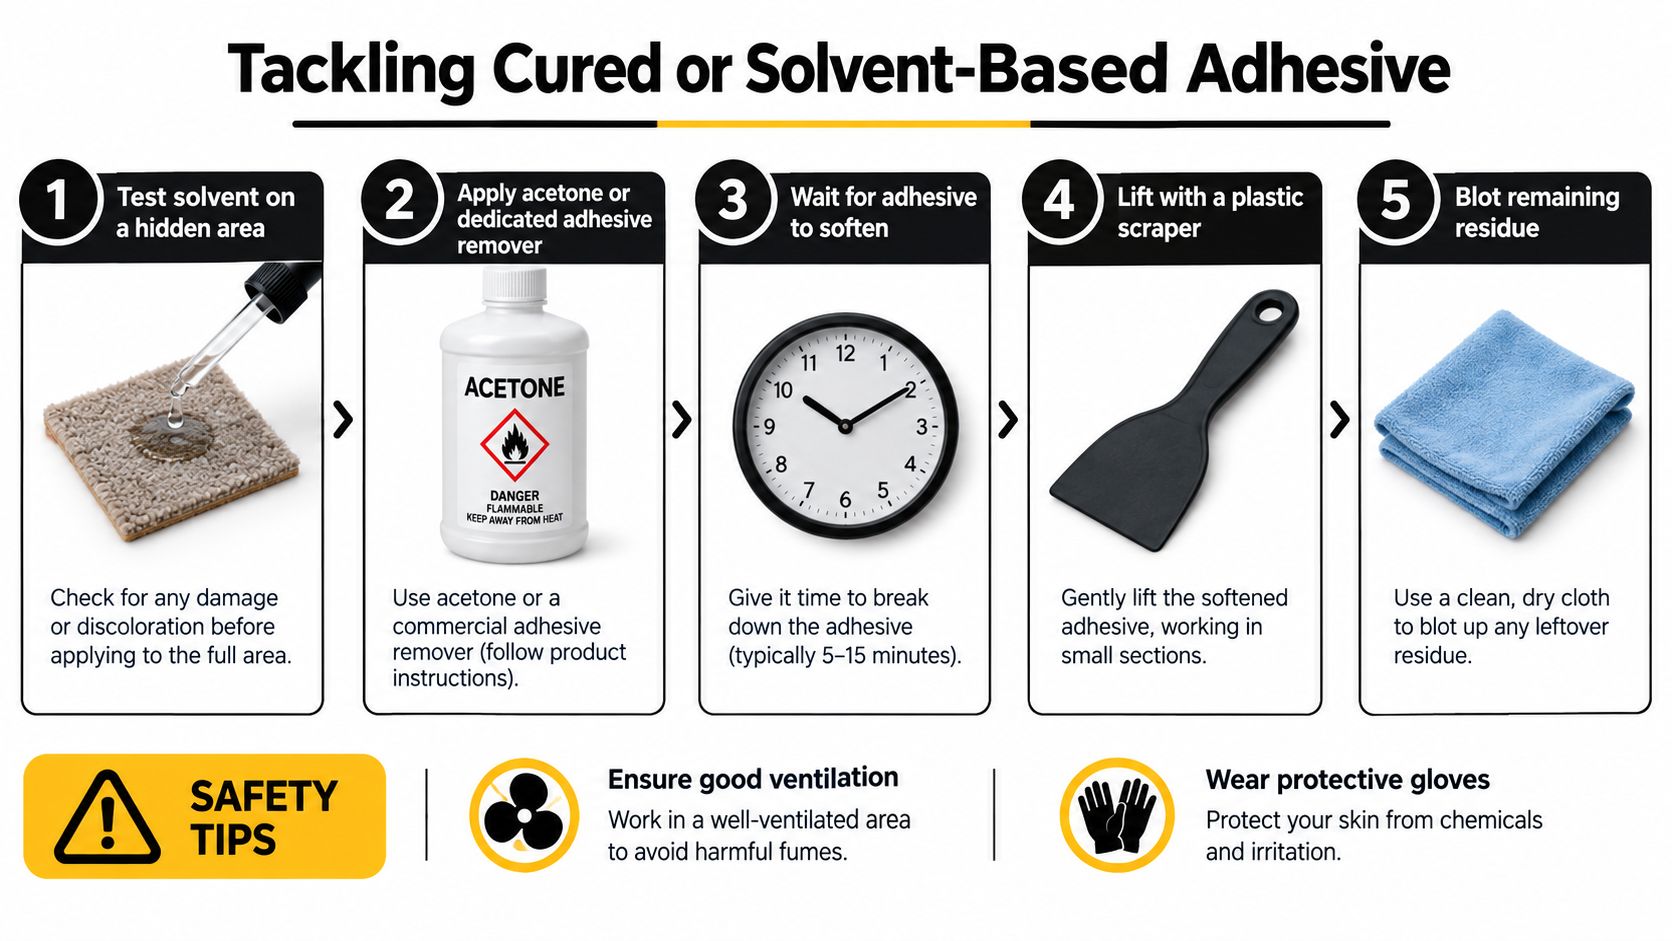
Do it this way:
- Test first in a hidden spot. This is critical with acetone or any adhesive remover.
- Put product onto a cloth or cotton pad, not directly onto the carpet.
- Dab the residue sparingly. You want penetration, not saturation.
- Wait briefly. Short contact is safer than leaving solvent to wander through the backing.
- Lift softened adhesive with a plastic scraper or cloth.
- Blot between passes. Don't keep flooding the same area.
Matching the method to the adhesive
Not all cured glue behaves the same way.
| Adhesive behaviour | Best response |
|---|---|
| Brittle spot on fibre tips | Solvent dab, then lift |
| Rubbery, smeary residue | Short solvent contact, blot repeatedly |
| Hard glue locked into backing | Stop spot-clean thinking and assess for repair or bonded installation |
A dedicated remover can work well on residues left after flooring work, but don't assume “stronger” means better. More product often means more spread. On wool, especially, small controlled passes are safer than one heavy application.
Open a window, wear gloves, and stop the moment you see dye on the cloth. The goal is to release the glue, not win a battle with the carpet.
Some people like to do a very light final wipe to clear remaining residue after solvent work. That's fine if the carpet has tolerated the earlier test and treatment, but keep it restrained. Overworking the area after the glue is gone creates its own mark.
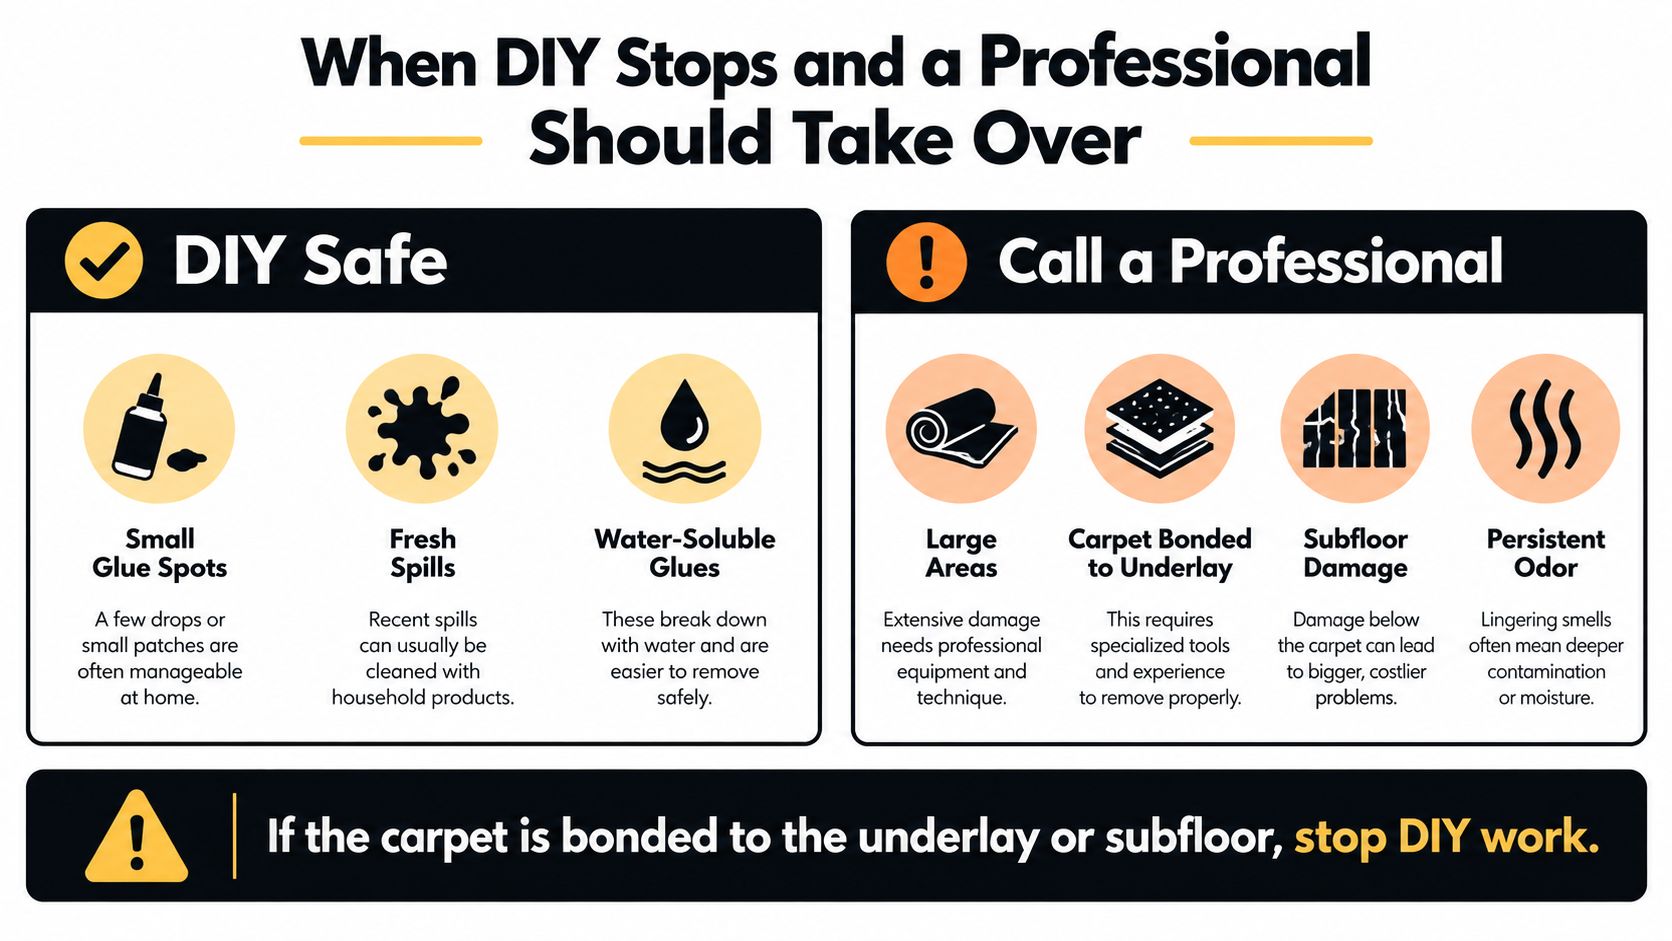
When DIY Stops and a Professional Should Take Over
Not every glue problem is a stain-removal job. Some are really installation problems wearing the disguise of a spill.
Most domestic carpets in the UK are typically fitted with the stretch-in method using gripper rods and underlay, while glue is more common with carpet tiles, direct-stick commercial installs, felt-backed carpet, and some awkward stair or edge applications. UK fitting guidance also notes dwell benchmarks such as 10 to 15 minutes for adhesive remover, around 30 minutes for vinegar, and about 1 hour for some water-soluble adhesive soaking, which tells you straight away that full adhesive removal is often a staged process rather than a quick clean, as described in this UK carpet-fitting and glue guide.
Signs you should stop
DIY usually stops being sensible when you notice one or more of these:
- The carpet won't lift locally: It feels fixed across a wider area.
- Adhesive shows at seams or edges: That points to installation adhesive, not a dropped blob.
- The patch is stiff through to the base: Surface treatment won't reach the full problem cleanly.
- There's a lingering chemical smell: That often means a stronger product is involved than ordinary craft glue.
- The subfloor starts coming up with it: At that point you're no longer cleaning. You're dismantling.
Why the handover matters
A bonded area may need a fitter or restoration specialist rather than more spot cleaning. Direct-stick removal can damage the subfloor and may leave levelling work behind before new flooring goes down. That's a very different job from lifting a glue spot out of pile.
If you've reached that stage, it makes sense to book a proper assessment through SWC Cleaning services or another suitable carpet or restoration provider, especially when the glue has migrated below the visible face yarn.
Mistakes That Damage Carpet Fibres During Removal
Most carpet damage during glue removal isn't caused by the glue. It's caused by the rescue attempt.
The biggest mistake is using a metal blade like a chisel. It feels efficient because it removes something fast. What it often removes is the tip of the pile. Once those fibres are shaved or snagged, the area reflects light differently and looks bald even after the glue is gone.
The common errors that leave permanent marks
Aggressive scraping
This snaps fibre ends and roughens the surface. Use plastic, not metal.Over-wetting the patch
Water can push softened glue deeper into the backing. It can also leave the base of the carpet slow to dry, which creates a whole separate issue.Skipping the colourfastness test
Solvent can strip dye. Even plain cleaning agents can alter colour on some carpets.Using the wrong remover for the fibre
A product that's tolerable on a tough synthetic may mark wool quickly.Rushing the dwell time
If the glue hasn't softened, people compensate by scrubbing harder. That's when pile distortion starts.
What to do instead
Use this substitution mindset:
| Instead of this | Do this |
|---|---|
| Force the glue off | Soften it fully first |
| Pour product on the spot | Apply to cloth, then transfer |
| Brush hard in circles | Blot and lift with the pile |
| Keep going when colour moves | Stop immediately |
A carpet can survive a spill surprisingly well. It doesn't always survive panic cleaning.
The moment fibres start fuzzing, matting, or changing shade, you're no longer removing glue. You're removing carpet finish.
Your Quick Reference for Glue Removal Success
If you want the short version, use this decision path.
Five checks before you carry on
- Identify the glue first: Craft glue and flooring adhesive aren't the same job.
- Test in a hidden area: Always check for dye lift or texture change.
- Start with the mildest method: Water-responsive glue should get a water-based attempt first.
- Escalate carefully: Use solvent only when the residue clearly needs it, and only in controlled small passes.
- Know when to stop: If the glue is in the backing or tied into the floor, treat it as a repair issue, not a stain.
For drying after spot treatment, especially if the backing got damp, it helps to understand how long carpet drying can take so you don't trap moisture and flatten the pile by walking on it too soon.
Ventilate when using acetone. Blot instead of rubbing. Keep heat away from unknown adhesives. Those three habits prevent most avoidable damage.
Most glue spills can be improved with patient, measured work. Rushing the job usually causes more harm than the original spill.
If the glue has spread into the backing, keeps reappearing after DIY treatment, or has left the carpet stiff and marked, SWC Cleaning can assess the spot properly and treat the carpet with the right surface-cleaning method for the fibre and residue. For help with adhesive marks, end of tenancy carpet issues, or deeper carpet cleaning work, visit SWC Cleaning.
Built with Outrank